Peanut Butter Cup Dump Cake Delight Recipe
Peanut Butter Cup Dump Cake Delight Recipe
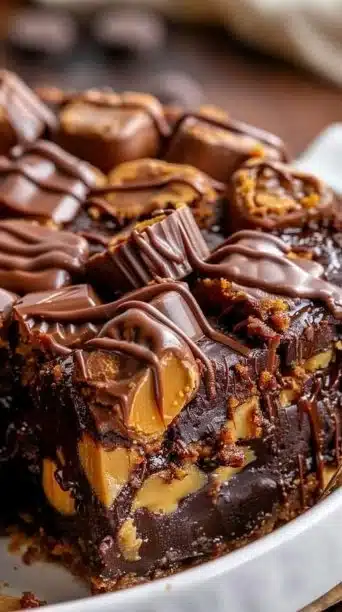
There’s something wonderfully nostalgic about a dessert that tastes like an oversized candy bar and requires almost no fuss — this Peanut Butter Cup Dump Cake Delight delivers that cozy, childhood-indulgence feeling in a single pan. Layers of peanut butter, melty chocolate chips, and chopped mini peanut butter cups bake into a golden, bubbly top that’s perfect for family gatherings or a weekend treat. If you’re curious about a lighter, spoonable peanut-butter-forward breakfast or snack inspired by this, see this creative peanut butter cup bowl variation at cottage cheese peanut butter cup bowl for a fun twist.
Why make this recipe
If you’re tired of spending hours on fussy desserts or battling with multiple bowls and steps, this dump cake is the answer: it’s quick, forgiving, and gives you the same crave-worthy peanut-butter-and-chocolate combo everyone loves. The method eliminates measuring wet-to-dry layering complexities and creates a gooey, textured bar with minimal cleanup. It’s ideal when you want something impressive without the stress.
Step-by-Step Guide to Making Peanut Butter Cup Dump Cake Delight Recipe
Ingredients:
- 1 (15.25 oz) yellow cake mix
- 1 cup creamy peanut butter
- 1/2 cup powdered sugar
- 1/4 cup milk
- 1 tsp vanilla extract
- 1 cup mini peanut butter cups, chopped
- 1 cup semi-sweet chocolate chips
- 1 1/2 sticks (12 tbsp) unsalted butter, melted
Directions:
Prepare Oven and Dish — Preheat your oven to 350°F (175°C) and lightly grease a 9×13-inch baking dish so the cake won’t stick. Greasing helps with cleanup and ensures the crunchy edges release cleanly from the pan when serving.
Melt Butter and Chop Cups — Melt the 1 1/2 sticks (12 tbsp) of unsalted butter and set it aside to cool slightly so it won’t curdle your peanut butter filling when combined. If your peanut butter cups are larger than the mini size, chop them so they’re easier to distribute and bite-sized in the finished cake.
Lay Cake Mix Foundation — Evenly sprinkle the entire box of yellow cake mix over the bottom of the prepared baking dish. Don’t worry about smoothing it into a perfect layer — the dry cake mix will absorb moisture from the other layers and transform into a cakey-tender top as it bakes.
Prepare and Spread Peanut Butter Layer — In a medium bowl, combine 1 cup creamy peanut butter, 1/2 cup powdered sugar, 1/4 cup milk, and 1 tsp vanilla extract until smooth and spreadable. The powdered sugar lightens the peanut butter and the milk loosens it into a spreadable consistency. Gently spoon and spread this mixture as evenly as possible over the dry cake mix layer — a light hand helps keep the dry mix from shifting too much.
Add Chocolate and Peanut Butter Cups — Generously sprinkle the chopped mini peanut butter cups and 1 cup semi-sweet chocolate chips evenly over the peanut butter layer. This is the candy-studded heart of the dessert; the chips and cups will melt and form pockets of gooey chocolate and peanut butter throughout.
Drizzle with Butter — Evenly pour the cooled melted butter over the entire surface of the cake, making sure to cover it fully. The butter is the key “dump” element here: it hydrates the cake mix and creates a delicious, golden crust as it bakes while allowing the chocolate and peanut butter to meld into the mix.
Bake — Place the dish in the preheated oven and bake for approximately 45–55 minutes, or until the top is a beautiful golden brown and the edges are visibly bubbling. Because ovens vary, start checking around 40–45 minutes; the center may remain slightly gooey, which is normal and part of the charm.
Cool and Serve — Carefully remove the pan from the oven and let it cool on a wire rack for at least 15–20 minutes before serving. This resting time helps the layers set slightly so slices hold together. Serve warm for maximum gooeyness; top with whipped cream or vanilla ice cream if you want an extra creamy contrast.
What to expect while baking and why each step matters
- The cake mix acts as both a topping and the structural base once it absorbs the butter and moisture from the peanut butter mixture. It doesn’t need eggs or extra wet ingredients because the melted butter and peanut butter provide enough fat and moisture for a tender crumb.
- The powdered sugar in the peanut butter layer helps stabilize the mixture and keeps it spoonable while creating a lightly sweet, confection-like filling.
- The chopped peanut butter cups and chocolate chips are intentionally generous — they melt into pockets that punctuate every bite with chocolate and salty-sweet peanut butter.
Best Way to Store Peanut Butter Cup Dump Cake Delight Recipe
- Room temperature: Store loosely covered at room temperature for up to 24 hours to preserve the slightly crisp top texture.
- Refrigerator: For longer storage, cover tightly with foil or plastic wrap and refrigerate for up to 5 days. Chilled cake will firm up and can be gently warmed before serving.
- Freezer: Wrap individual slices in plastic wrap and then foil and freeze for up to 3 months. Thaw overnight in the refrigerator and reheat gently in a low oven or microwave.
Serving Suggestions for Peanut Butter Cup Dump Cake Delight Recipe
- Warm and gooey: Serve a generous square straight from the oven with a scoop of vanilla ice cream and a drizzle of hot fudge for decadent contrast.
- Casual crowd-pleaser: Cut into bars and arrange on a platter for potlucks or bake sales — people will line up for the peanut butter cups.
- Elevated dessert plate: Add a sprig of mint and a dusting of powdered sugar for a fancier presentation, or serve with a side of salted caramel sauce to complement the peanut butter.
- Family-friendly: Offer napkins and small forks—this is a slightly sticky, hands-on dessert that’s best enjoyed with utensils.
Tips to make Peanut Butter Cup Dump Cake Delight Recipe
- Use room-temperature peanut butter: It mixes easier with the powdered sugar and milk, creating a smoother layer that’s simpler to spread.
- Don’t skip chilling time if you plan to store it: the flavors meld and the texture firms up, making cleaner slices.
- Even distribution of toppings matters: press the chocolate chips and chopped cups gently into the peanut butter layer so they don’t all float to one corner during baking.
Variations (if any)
- Peanut butter alternative: Swap creamy peanut butter for a natural-style peanut butter, but expect a slightly thinner layer; you may want to increase the powdered sugar by a tablespoon for stability.
- Nut-free twist: Replace peanut butter and peanut butter cups with a sunflower seed butter and sunflower butter cups for a nut-free alternative that keeps the same texture and color contrast.
FAQs
Q: How can I prevent the top from getting too brown before the middle is done?
A: Tent loosely with foil around the 35–40 minute mark if the top browns faster than the center bakes.
Q: Can I make this with a chocolate cake mix instead of yellow?
A: Yes — swap the yellow cake mix for chocolate for a richer, more intensely chocolatey experience. The flavor will shift but the technique remains the same.
Q: Is it okay if the center looks a bit gooey when taken out of the oven?
A: Absolutely. The center will set as it cools; a slightly gooey middle is typical and desirable for a dump cake with candy pieces.
What if something goes wrong?
- If the peanut butter layer becomes too thin or runny when spreading, pop the pan into the refrigerator for 10–15 minutes to firm it slightly, then continue topping and baking.
- If you forget to melt the butter and pour it cold, it may not spread evenly. Warm it gently until pourable; cool but still liquid is ideal.
Extra tips for presentation and reheating
- Reheating: Warm individual slices in the microwave for 20–30 seconds or in a 325°F oven for 8–10 minutes to revive the gooey texture.
- Garnishes: Coarsely chop extra peanut butter cups and sprinkle some on top after baking while the cake is still slightly tacky so they adhere.
- Portioning: Use a warmed knife to slice neater pieces — wipe the blade between cuts for clean edges.
Hands-on troubleshooting
- If your cake ends up overly dense: It might be underbaked in the center even if the edges are bubbling; give it an extra 5–10 minutes and check again.
- If the top is dry: The butter coverage might have been insufficient; next time, ensure even pouring and consider pressing some additional chips or chopped cups into any bare spots before baking.
A few serving-event ideas
- Family movie night: Make it as a warm treat during intermission, served with small bowls of ice cream.
- Birthday potluck: Add colorful sprinkles to the top immediately after baking for a celebratory look.
- Quick dessert for guests: Bake ahead, refrigerate, then reheat slightly and serve with hot coffee for an easy hosting solution.
Nutrition and portioning notes
- This dessert is indulgent and calorie-dense because of the butter, peanut butter, and chocolate. Cut into smaller bars for portion control, and pair with fresh fruit or a simple salad to balance richness.
- For those watching sugar, you can try a reduced-sugar cake mix and slightly reduce the chocolate chips, but the overall profile will remain a sweet treat.
Final thoughts on technique
- The magic of a dump cake lies in its simplicity — the layering order and the even dispersal of butter are what create the desirable marbled, gooey texture. Don’t overwork the peanut butter layer; gentle spreading preserves the dry cake mix layer beneath and helps deliver that crumbly top.
Conclusion
For a classic spin on a nostalgic candy-bar dessert baked into a single, shareable pan, you’ll find a closely related recipe and helpful baking notes at Chocolate Peanut Butter Dump Cake – Mom Loves Baking. If you want another take with slightly different proportions and serving ideas, check out the original inspiration and variations at Peanut Butter Cup Dump Cake – Dinners, Dishes, and Desserts.
Print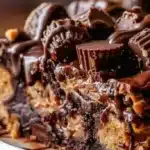
Peanut Butter Cup Dump Cake Delight
- Total Time: 70 minutes
- Yield: 12 servings 1x
- Diet: Vegetarian
Description
A nostalgic dessert that combines the flavors of peanut butter cups and chocolate in a simple, fuss-free dump cake.
Ingredients
- 1 (15.25 oz) yellow cake mix
- 1 cup creamy peanut butter
- 1/2 cup powdered sugar
- 1/4 cup milk
- 1 tsp vanilla extract
- 1 cup mini peanut butter cups, chopped
- 1 cup semi-sweet chocolate chips
- 1 1/2 sticks (12 tbsp) unsalted butter, melted
Instructions
- Preheat your oven to 350°F (175°C) and lightly grease a 9×13-inch baking dish.
- Melt the unsalted butter and set it aside to cool slightly.
- Evenly sprinkle the yellow cake mix over the bottom of the prepared baking dish.
- In a medium bowl, combine peanut butter, powdered sugar, milk, and vanilla extract until smooth and spreadable.
- Spread the peanut butter mixture evenly over the cake mix layer.
- Sprinkle the chopped mini peanut butter cups and semi-sweet chocolate chips evenly over the peanut butter layer.
- Pour the melted butter evenly over the entire surface of the cake.
- Bake for approximately 45–55 minutes, or until golden brown and edges are bubbling.
- Let it cool on a wire rack for at least 15–20 minutes before serving.
Notes
Serve warm with whipped cream or vanilla ice cream for added decadence.
- Prep Time: 15 minutes
- Cook Time: 55 minutes
- Category: Dessert
- Method: Baking
- Cuisine: American
Nutrition
- Serving Size: 1 serving
- Calories: 400
- Sugar: 26g
- Sodium: 300mg
- Fat: 20g
- Saturated Fat: 10g
- Unsaturated Fat: 8g
- Trans Fat: 0g
- Carbohydrates: 45g
- Fiber: 2g
- Protein: 6g
- Cholesterol: 45mg
Keywords: dessert, dump cake, peanut butter, chocolate, easy recipe