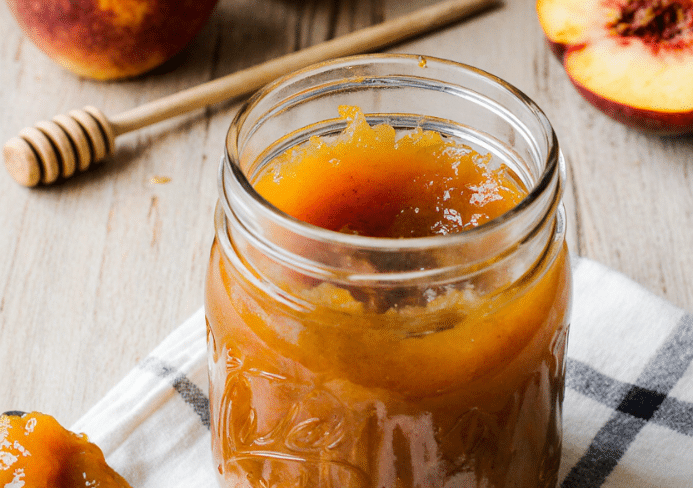
Easy Homemade Plum Jam 🍇 | Sweet & Simple Preserve Recipe
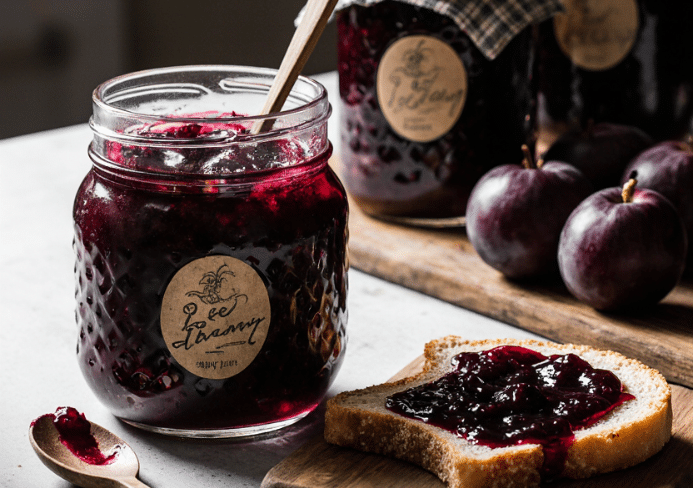
Making homemade plum jam is one of the easiest and most rewarding kitchen projects you can try. With just a few ingredients and no special equipment, you can create a rich, tangy-sweet preserve that’s perfect for toast, desserts, and even savory dishes. Whether you’re a seasoned canner or a first-time jam-maker, this sweet and simple preserve recipe is designed to help you succeed.
Table of Contents
Plum jam not only captures the vibrant flavor of summer, but it also allows you to preserve the goodness of fresh plums all year round. It’s naturally high in pectin, so you don’t even need added commercial pectin. Plus, it’s a great way to cut down on waste if you have a surplus of ripe plums.
For those concerned with safety in home canning, the USDA Guide to Home Canning offers essential guidance on proper methods and sterilization techniques. Following recommended canning procedures ensures your preserves are both safe and shelf-stable.
In terms of nutrition, plums are more than just delicious—they’re packed with antioxidants, fiber, and essential vitamins. According to Healthline’s guide to plum benefits, plums support heart health, digestion, and even blood sugar management, making homemade plum jam a flavorful and functional addition to your pantry.
Ingredients & Equipment Needed
Before we dive into the steps, here’s what you’ll need for a basic batch of plum jam.
Ingredients:
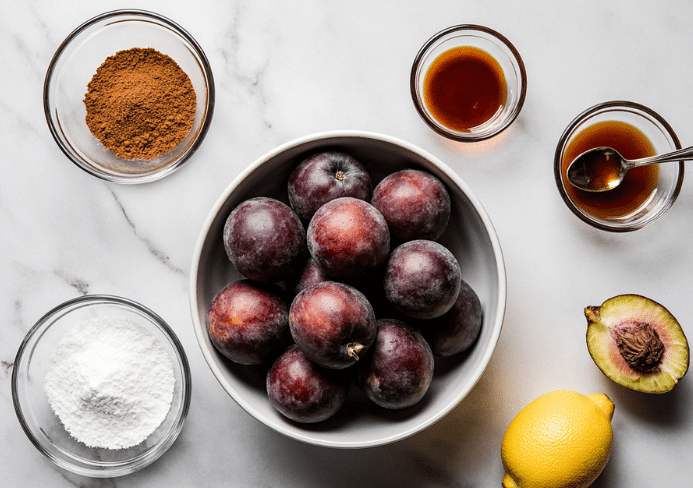
- 2 lbs of ripe plums, pitted and chopped (about 4–5 cups)
- 2 cups granulated sugar (adjustable for low-sugar variation)
- 2 tablespoons fresh lemon juice
- Optional: ½ teaspoon ground cinnamon or vanilla extract
Equipment:
- Large heavy-bottomed pot
- Wooden spoon or silicone spatula
- Potato masher or hand blender (optional)
- Canning jars with lids
- Jar funnel and ladle
- Sterilization and sealing tools from Ball® or similar canning equipment
Step-by-Step: How to Make Plum Jam
Making plum jam from scratch is simpler than you think. Here’s a step-by-step breakdown:
1. Prep the Plums
- Wash and pit the plums. No need to peel.
- Chop them into small chunks.
- Optional: Mash slightly with a potato masher if you like a smoother jam.
2. Combine Ingredients
- In a large pot, add plums, sugar, and lemon juice.
- Stir to combine, then let the mixture sit for 15–20 minutes to draw out the juices.
3. Cook the Jam
- Bring the mixture to a boil over medium-high heat.
- Stir frequently to prevent sticking or burning.
- Cook for 20–30 minutes, skimming off any foam.
- Use a chilled plate or thermometer (target 220°F) to test for set.
4. Blend or Leave Chunky
- For a smoother texture, blend the jam with a hand blender before transferring to jars.
5. Jar and Seal
- Use sterilized jars and ladle hot jam into them.
- Wipe rims clean and seal tightly.
- Process in a boiling water bath for 10 minutes for longer shelf life.
Tips for Perfect Plum Jam
- Use ripe but not overripe plums for the best flavor and pectin content.
- Don’t skip the lemon juice—it helps the jam set and balances the sweetness.
- Stir constantly near the end to prevent burning.
- Always use clean, sterilized jars and follow safety practices.
Flavor Variations to Try
Want to elevate your homemade plum jam? Try these delicious twists:
- Spiced Plum Jam: Add cinnamon, cloves, or cardamom.
- Vanilla Plum Jam: Stir in a teaspoon of vanilla extract just before jarring.
- Plum + Other Fruit Blends:
- Plum and apricot
- Plum and raspberry
- Plum and fig
Creative Uses for Plum Jam
Once you’ve made a few jars, you’ll want to put them to good use:
- Spread on toast, muffins, or biscuits
- Fill thumbprint cookies or cake layers
- Use as a glaze for roasted meats or grilled cheese
- Mix into yogurt, oatmeal, or smoothies
- Pair with cheese boards (great with brie or blue cheese)
Storage & Shelf Life
Properly canned and sealed jars can last up to a year in a cool, dark place.
- Refrigerate after opening and use within 3–4 weeks
- Freeze jam in freezer-safe containers for up to 6 months
- Check seals and discard if there’s any sign of spoilage (mold, off smell)
Homemade Jam as a Gift
Plum jam makes a thoughtful and tasty homemade gift. Here are some fun packaging ideas:
- Use fabric scraps to cover lids and tie with twine
- Add handwritten labels with the jam name and date
- Create themed gift baskets with bread, tea, or scones
Nutritional Highlights
Plum jam is naturally:
- Gluten-free
- Vegan
- Rich in antioxidants and vitamin C
- Around 40–60 calories per tablespoon (varies by sugar content)
For low-sugar plum jam, reduce the sugar and add a small amount of commercial pectin or allow extra cooking time.
FAQs – People Also Ask
Q: How do you thicken plum jam without pectin?
A: Simply cook the mixture longer and use lemon juice to help natural pectin activate.
Q: Can I make plum jam with frozen plums?
A: Yes! Thaw and drain first to reduce excess water.
Q: Do you need to peel plums for jam?
A: No, the skins break down during cooking and add natural color and texture.
Q: How long does homemade plum jam last in jars?
A: Up to 12 months if properly sealed and stored.
Q: What’s the difference between jam, jelly, and preserves?
A: Jam uses crushed fruit, jelly uses fruit juice, and preserves have larger fruit chunks.
Q: Can I reduce the sugar in plum jam?
A: Yes, but it may affect the set. Use pectin or cook longer for thicker texture.
Q: Is lemon juice necessary for jam?
A: Yes, it’s vital for acidity, flavor balance, and proper setting.
Easy Homemade Plum Jam 🍇 | Sweet & Simple Preserve Recipe
- Total Time: 50 mins
- Yield: 3–4 half-pint jars 1x
Description
This easy plum jam is made with fresh ripe plums, sugar, and lemon juice, with optional warm spice or vanilla for added depth. No pectin required—just classic small-batch canning goodness.
Ingredients
- 2 lbs of ripe plums, pitted and chopped (about 4–5 cups)
- 2 cups granulated sugar (adjustable for low-sugar variation)
- 2 tablespoons fresh lemon juice
- Optional: ½ teaspoon ground cinnamon or vanilla extract
Instructions
- Prepare the Plums: Wash, pit, and chop the plums. No need to peel. For a smoother jam, mash them slightly with a fork or potato masher.
- Combine Ingredients: In a large pot, combine plums, sugar, and lemon juice. Let the mixture sit for 15–20 minutes to draw out natural juices.
- Cook the Jam: Bring the mixture to a boil over medium-high heat. Stir frequently to prevent sticking, skim off any foam, and cook for 20–30 minutes until thickened. Optional: add cinnamon or vanilla extract during the final minutes.
- Test the Set: Drop a spoonful onto a chilled plate and run your finger through it; if it wrinkles, it’s ready. Or use a thermometer and aim for 220°F (104°C).
- Optional Blend: For a smoother consistency, blend with an immersion blender before jarring.
- Jar and Seal: Carefully pour the hot jam into sterilized jars. Wipe rims clean, apply lids, and process in a boiling water bath for 10 minutes to seal.
Notes
You can reduce the sugar for a more tart jam or add spices for flavor variations. Store sealed jars in a cool, dark place for up to a year. Refrigerate after opening.
- Prep Time: 20 mins
- Cook Time: 30 mins
- Category: Conservas / Mermeladas
- Method: Cocción en cazo + envasado
- Cuisine: Casera / Conservación
Nutrition
- Serving Size: 1 tablespoon
- Calories: 45
- Sugar: 10g
- Sodium: 0mg
- Fat: 0g
- Saturated Fat: 0g
- Unsaturated Fat: 0g
- Trans Fat: 0g
- Carbohydrates: 11g
- Fiber: 0.5g
- Protein: 0g
- Cholesterol: 0mg
Keywords: plum jam, homemade preserves, low-sugar jam, no pectin jam, canning recipe