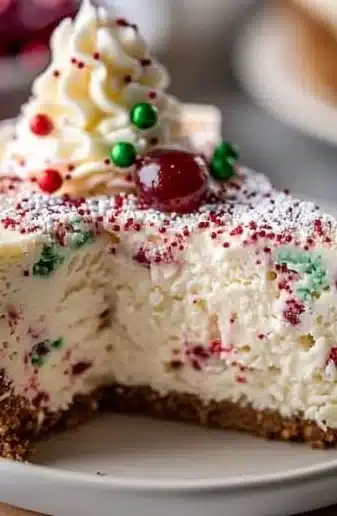
Decadent No-Bake Little Debbie Christmas Tree Cake Truffles
Decadent No-Bake Little Debbie Christmas Tree Cake Truffles
There’s something undeniably magical about the holiday season. The air is infused with the scent of pine, laughter dances through the halls, and the kitchen is a haven filled with mouthwatering aromas. One delightful treat that embodies this festivity is the No-Bake Little Debbie Christmas Tree Cake Truffles. With their creamy texture, dazzling appearance, and delightful flavors, these truffles are sure to become a staple at your holiday gatherings. They not only capture the essence of nostalgia but also bring joy to both young and old, making them the perfect festive treat to share with your loved ones.
Why Make This Recipe
- Convenience: With no baking required, these truffles come together in a snap, making them perfect for busy holiday schedules.
- Nostalgia: If you grew up loving Little Debbie cakes, these truffles will transport you back to those cheat days with a twist of elegance.
- Visual Appeal: The vibrant colors and festive decorations make these truffles not only delicious but also a feast for the eyes, sure to impress your guests.
How to Make No-Bake Little Debbie Christmas Tree Cake Truffles
Creating No-Bake Little Debbie Christmas Tree Cake Truffles is both a fun and festive activity, perfect for family gatherings or cozy evenings at home. Gather your ingredients, roll up your sleeves, and let’s dive into making these delectable treats.
Step-by-Step Guide to Making No-Bake Little Debbie Christmas Tree Cake Truffles
Unwrap the Magic: Begin your journey by unwrapping all twelve Little Debbie Christmas Tree Cakes. Lay them out on a clean surface, resisting any temptations to sample them yet! Each cake is essential for crafting this delightful treat, and their iconic flavor will meld beautifully in your truffles.
Crush Your Cakes: Now comes the really fun part. You want to create fine, moist crumbs here. You have two options:
- Food Processor Method (Recommended): Break each cake into 2-3 pieces, placing them in your food processor. Pulse until you achieve a consistency similar to coarse sand, ensuring there are no large chunks left.
- Manual Method: If you don’t have a food processor, pop the unwrapped cakes into a sturdy zip-top bag, seal it, and crush them using a rolling pin or heavy pan until they resemble fine crumbs.
Bind with Cream Cheese: Transfer those lovely crumbs into a large mixing bowl. Add softened cream cheese into the bowl. If your cream cheese is too firm, microwave it for 10-15 seconds. Using an electric mixer or a spatula, mix until the cream cheese and crumbs form a cohesive dough. The right texture is key; you want it firm enough to roll into balls but not too wet.
Roll into Truffles: Prepare your workspace with a baking sheet lined with parchment paper. Use a small cookie scoop or tablespoon to portion the mixture and roll each into smooth, uniform balls. This recipe should yield about 24-30 truffles, depending on size.
Chill Out: Place the baking sheet with your truffles into the refrigerator for at least 30 minutes. Chilling allows them to firm up, ensuring they hold their shape during the dipping process. If you’re in a rush, you can freeze them for 15-20 minutes.
Prepare Your Coating Chocolate: As your truffles chill, it’s time to melt the white candy melts. You can use either the microwave or the double boiler method. Whichever you choose, stir occasionally until smooth and silky. If the chocolate is too thick, a little coconut oil can help achieve an ideal consistency.
Color Your Chocolate (Optional but Recommended for Festive Look): For that quintessential holiday feel, divide the melted chocolate into two bowls if you like variety. Add a few drops of gel food coloring to achieve that perfect festive shade of green (or red, if you prefer). Gel coloring is favored because it won’t affect the chocolate’s texture.
Dip Those Truffles: Remove your chilled truffles from the refrigerator. Dip each truffle into your melted chocolate, letting the excess drip off. Place the coated truffles back onto the parchment-lined baking sheet.
Decorate Immediately: While the chocolate on your truffles is still wet, sprinkle them with festive sprinkles or edible glitter to add a cheerful touch. The key is to do this right after dipping, ensuring the sprinkles stick beautifully. For an extra festive flair, use star-shaped sprinkles on your green truffles to mimic Christmas tree toppers.
Set and Enjoy: Once dipped and decorated, allow the truffles to chill in the refrigerator again for 15-30 minutes to set the chocolate. They’re ready to serve when the coating is firm to the touch and has a nice snap when you bite in.
Storage Sweetness: Keep your truffles in an airtight container in the refrigerator. They will remain fresh and delicious for 1-2 weeks. For an even better experience, let them sit at room temperature for 10-15 minutes before serving.
Ingredients
- 1 box Little Debbie Christmas Tree Cakes
- 8 ounces white chocolate or candy melts
- 3 tablespoons Festive sprinkles
- 3 tablespoons Red candy melts (for drizzling)
- Green sanding sugar (for decoration)
Directions
Unwrap the Magic: The first step to creating these delightful "Little Debbie Christmas Tree Cakes Truffles" is to carefully unwrap all twelve of your Little Debbie Christmas Tree Cakes. Lay them out on a clean surface. While it might be tempting to nibble, resist! Every cake is vital for the perfect batch of truffles.
Crush Your Cakes: Now, for the fun part! There are a couple of ways to achieve the perfect crumb.
- Food Processor Method (Recommended for efficiency and uniformity): Break each Christmas Tree Cake into 2-3 pieces and place them into your food processor. Pulse a few times until the cakes are completely broken down into fine, moist crumbs. Be careful not to over-process, as you don’t want to turn it into a paste just yet. You’re aiming for a consistency similar to coarse sand or very fine dirt – still distinct crumbs, but very uniform. This step ensures that every bite of your "Little Debbie Christmas Tree Cakes Truffle" will be perfectly smooth and consistent.
- Manual Method (If you don’t have a food processor): Place the unwrapped cakes into a large, sturdy zip-top bag. Seal the bag, pressing out most of the air. Using a rolling pin, meat mallet, or even the bottom of a heavy pan, thoroughly crush the cakes until they form fine crumbs. This method requires a bit more elbow grease, but it’s equally effective. Just make sure there are no large chunks left behind, as they can disrupt the texture of your truffles. Transfer the crushed cake crumbs into a large mixing bowl.
Bind with Cream Cheese: Add the softened cream cheese to the bowl with the cake crumbs. If your cream cheese isn’t soft enough, microwave it for 10-15 seconds; it should be very pliable. Using an electric mixer on low speed, or a sturdy spatula, mix the cream cheese into the cake crumbs. At first, it might seem like there isn’t enough cream cheese, but keep mixing! The warmth from your hands (if using a spatula) and the mixing action will help incorporate it. Mix until the mixture comes together and forms a cohesive, slightly sticky dough. It should be firm enough to roll into balls without crumbling, but not so wet that it’s mushy. If it feels too dry, add another half ounce of softened cream cheese and mix again. If by some chance it feels too wet (perhaps your cakes were extra moist), you can try adding a tablespoon of powdered sugar, though this is rarely needed. This mixture is the heart of your "Little Debbie Christmas Tree Cakes Truffles."
Roll into Truffles: Line a baking sheet with parchment paper or a silicone baking mat. Using a small cookie scoop (about 1.5 tablespoons) or just a tablespoon, scoop out portions of the cake mixture. Roll each portion firmly between your palms to form smooth, round balls. Aim for uniformity in size, which will help them dip and set evenly later. This recipe typically yields about 24-30 truffles, depending on the size. As you roll, place the finished truffles on your prepared baking sheet. Tip: If the mixture starts to stick to your hands, wash and dry them, or lightly dust your hands with a tiny bit of powdered sugar.
Chill Out: Once all your truffles are rolled, place the baking sheet in the refrigerator for at least 30 minutes, or even better, for 1-2 hours. This chilling step is absolutely crucial. It allows the truffles to firm up, making them much easier to dip in chocolate without falling apart. A firm cake ball will also ensure a smoother, more even chocolate coating for your "Little Debbie Christmas Tree Cakes Truffles." If you’re in a hurry, you can place them in the freezer for 15-20 minutes.
Prepare Your Coating Chocolate: While your truffles are chilling, it’s time to prepare your white candy melts or white chocolate.
- Microwave Method: Place 2/3 of your white candy melts into a microwave-safe bowl. Microwave in 30-second intervals, stirring thoroughly after each interval. It’s important to stir even if they don’t look melted, as the heat distributes unevenly. Continue until the melts are smooth and fully melted, but not hot. Once smooth, add the remaining 1/3 of the candy melts and stir until they are fully incorporated and melted by the residual heat. This tempering-like method helps keep the chocolate smooth and less prone to seizing. If the chocolate is too thick for dipping, stir in 1/2 to 1 teaspoon of coconut oil or vegetable shortening until you reach a smooth, pourable consistency.
- Double Boiler Method: Fill a saucepan with about an inch or two of water and bring it to a simmer. Place a heat-safe bowl on top of the saucepan, ensuring the bottom of the bowl does not touch the water. Add all your white candy melts to the bowl. Stir continuously as the melts slowly melt from the steam. Once smooth, remove from heat. Again, if too thick, add coconut oil or shortening.
Color Your Chocolate (Optional but Recommended for Festive Look): Divide your melted white chocolate into two or three separate bowls if you plan to have different colors. For the classic "Little Debbie Christmas Tree Cakes Truffles" look, we’ll want green! Add a small amount of green gel food coloring to one bowl of white chocolate. Start with a tiny drop and add more until you achieve your desired shade of festive green. Stir gently until the color is fully incorporated. Gel coloring is best as it won’t add excess liquid that can seize the chocolate. You can leave one bowl white or even dye a small amount red if you wish for variety.
Dip Those Truffles! Remove the chilled truffles from the refrigerator. Set up your decorating station: bowls of melted chocolate, bowls of sprinkles, and an empty parchment-lined baking sheet for the finished truffles. Using a fork or a specialized dipping tool, carefully drop one truffle into the melted chocolate (green, white, or whatever color you choose). Gently spoon the chocolate over the truffle until it’s completely coated. Tap the fork gently against the side of the bowl to allow any excess chocolate to drip off. This helps prevent puddles at the bottom of your truffles. Carefully slide the coated truffle onto the prepared baking sheet. Work quickly: The chilled truffle will cause the chocolate to set relatively fast.
Decorate Immediately: As soon as you place a dipped truffle on the parchment paper, immediately sprinkle it with your desired Christmas sprinkles or edible glitter. The chocolate needs to be wet for the sprinkles to adhere properly. Don’t wait until you’ve dipped all of them, or your sprinkles won’t stick! For a particularly festive look, use small star sprinkles on top of the green truffles to mimic the star on a Christmas tree. You can also drizzle contrasting chocolate colors over set truffles for an elegant finish. For instance, white chocolate drizzle over green truffles or vice versa. Repeat the dipping and decorating process with all the remaining truffles, ensuring each one gets its unique festive touch. This is where the magic of your "Little Debbie Christmas Tree Cakes Truffles" truly comes alive!
Set and Enjoy: Once all the "Little Debbie Christmas Tree Cakes Truffles" are dipped and decorated, place the baking sheet back into the refrigerator for at least 15-30 minutes. This final chill allows the chocolate coating to fully harden and set. You’ll know they’re ready when the chocolate is firm to the touch and has a nice snap when bitten into.
Storage Sweetness: Store your finished Little Debbie Christmas Tree Cakes Truffles in an airtight container in the refrigerator. They will stay fresh and delicious for up to 1-2 weeks. You can also stack them with layers of parchment paper in between to prevent sticking. While they are best enjoyed slightly chilled, letting them sit at room temperature for 10-15 minutes before serving can enhance their flavor and soften the cake interior for an even more delightful experience. These truffles are not only a delicious treat but also make for wonderful homemade gifts during the holiday season! Enjoy sharing these incredibly festive and easy-to-make treats with all your loved ones.

Storage Tips for No-Bake Little Debbie Christmas Tree Cake Truffles
- Refrigerate: Keep truffles stored in an airtight container at 40°F for up to 1-2 weeks.
- Freeze: For longer storage, you can freeze them for up to 2 months. Just make sure they are well-wrapped in plastic wrap and placed in an airtight container to avoid freezer burn.
- Thawing: When ready to enjoy, allow them to thaw in the refrigerator for a few hours or at room temperature for about 15-20 minutes.
Best Ways to Serve No-Bake Little Debbie Christmas Tree Cake Truffles
Serving these truffles can be just as fun as making them. Here are a few ideas to showcase your festive creations:
- Gift Baskets: Arrange the truffles in small holiday-themed gift boxes or baskets. They make great presents for neighbors or teachers.
- Party Platters: Include them on a dessert platter alongside other festive treats like cookies and candies. Their vibrant colors will catch the eye!
- Sweet Table Decor: Use a tiered dessert stand to present your truffles as part of a holiday dessert table. A festive touch, like a miniature Christmas tree, can elevate the presentation.
- Hot Chocolate Pairing: Serve with warm cups of hot cocoa for a delightful pairing that enhances the holiday spirit.
Tips to Make No-Bake Little Debbie Christmas Tree Cake Truffles
- Use Room Temperature Ingredients: Ensure your cream cheese is at room temperature for easier mixing.
- Customize Your Sprinkles: Get creative with the decorations! Consider using edible glitter or different shapes of sprinkles.
- Mix Consistently: When combining ingredients, aim for a uniform texture to ensure each truffle is equally delicious.
- Experiment with Flavor: Add a dash of vanilla extract or mint extract for an unexpected flavor twist.
Variations or Substitutions
If you want to put a different spin on these truffles, consider these variations:
- Flavored Cream Cheese: Use flavored cream cheese like strawberry or chocolate for a unique take.
- Alternative Cakes: Instead of Little Debbie Christmas Tree Cakes, you could use other cake snacks like Swiss rolls or snack cakes for different flavor profiles.
FAQs
Q: Can I make this ahead?
A: Yes, these truffles can be made in advance and stored in the refrigerator for up to 1-2 weeks. They are perfect for preparing ahead of time!
What’s the best way to store leftover truffles?
Store them in an airtight container in the refrigerator or freeze them for longer preservation.
Q: How do I make them spicier?
A: For a little spice, you can add a pinch of cayenne pepper to the chocolate coating or dust some ground cinnamon on top for a warm flavor contrast.
Each of these truffles not only exemplifies the joy of the holiday season but also embodies the creativity of home baking. Dive into this recipe, create your batch, and watch as they become a cherished part of your holiday traditions. Enjoy the smiles and delight they bring to your gatherings, making your season a bit sweeter!
Print
Decadent No-Bake Little Debbie Christmas Tree Cake Truffles
- Total Time: 30 minutes
- Yield: 24-30 truffles 1x
- Diet: Vegetarian
Description
Magical no-bake truffles inspired by Little Debbie Christmas Tree Cakes, perfect for holiday festivities.
Ingredients
- 1 box Little Debbie Christmas Tree Cakes
- 8 ounces white chocolate or candy melts
- 3 tablespoons festive sprinkles
- 3 tablespoons red candy melts (for drizzling)
- Green sanding sugar (for decoration)
Instructions
- Unwrap the Little Debbie Christmas Tree Cakes and lay them out.
- Crush the cakes into fine crumbs using a food processor or a zip-top bag with a rolling pin.
- Add softened cream cheese to the crumbs and mix until a cohesive dough forms.
- Roll the mixture into smooth, uniform balls and place them on a lined baking sheet.
- Chill the truffles in the refrigerator for at least 30 minutes.
- Melt the white chocolate or candy melts until smooth, adding coconut oil if necessary.
- Color the chocolate if desired, then dip each truffle and place them back on the baking sheet.
- Decorate immediately with festive sprinkles while the chocolate is still wet.
- Let the truffles sit in the refrigerator for another 15-30 minutes to set.
- Store in an airtight container in the refrigerator for 1-2 weeks.
Notes
These truffles can be customized with different flavors of cream cheese or cake snacks.
- Prep Time: 30 minutes
- Cook Time: 0 minutes
- Category: Dessert
- Method: No-Bake
- Cuisine: American
Nutrition
- Serving Size: 1 truffle
- Calories: 150
- Sugar: 10g
- Sodium: 60mg
- Fat: 8g
- Saturated Fat: 4g
- Unsaturated Fat: 3g
- Trans Fat: 0g
- Carbohydrates: 18g
- Fiber: 0g
- Protein: 1g
- Cholesterol: 15mg
Keywords: no-bake, truffles, Christmas, holiday treats, Little Debbie

