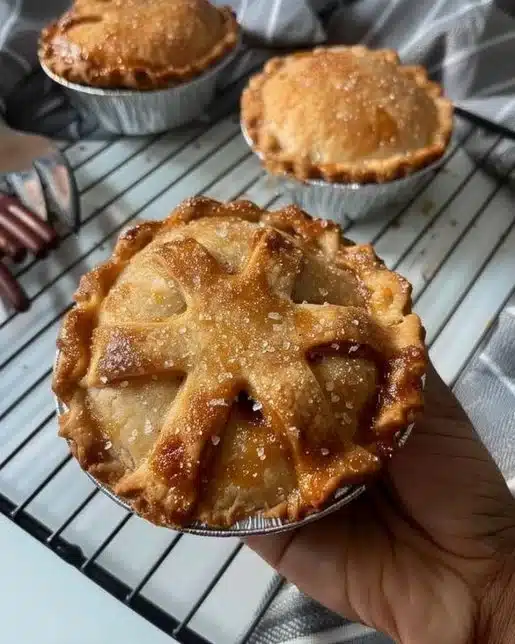
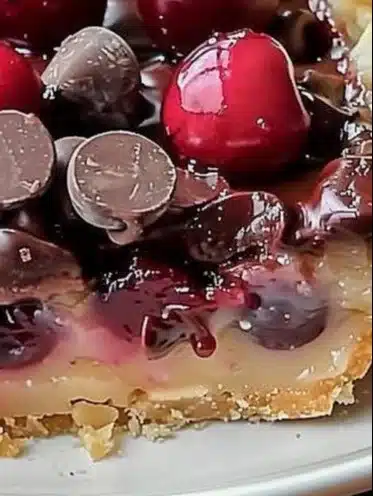
Homemade Cherry Pie From Scratch
There’s nothing quite like a homemade cherry pie from scratch—that golden, flaky crust cradling a thick, jammy, and perfectly sweet cherry pie filling. Whether you’re baking for the holidays, a summer gathering, or just a personal indulgence, learning how to make cherry pie at home is one of the most rewarding baking experiences.
Table of Contents
Unlike store-bought versions, a from-scratch cherry pie gives you full control over the ingredients, flavor balance, and texture. This means no canned fillings, no pre-made dough—just fresh cherries, real butter, and a crust that shatters with every forkful. If you’re new to selecting the right fruit, check out the USDA’s guide to choosing fresh cherries to make sure you pick the best ones.
Crafting the perfect crust can be intimidating, but it’s far easier with the right approach. For a step-by-step breakdown of making flaky pastry at home, we recommend the King Arthur Baking pie crust guide, which simplifies the entire process for beginner and seasoned bakers alike.
Ingredients You’ll Need
Here’s what you’ll need to make this classic cherry pie completely from scratch:
For the filling:
- 4 ½ cups fresh pitted cherries (half halved, half quartered)
- ⅔ cup granulated sugar
- ¼ cup cornstarch
- 1 tablespoon lemon juice
- 1 teaspoon pure vanilla extract
- ¼ teaspoon almond extract
- 1 tablespoon cold unsalted butter (cubed)
For the pie crust:
- 2 ½ cups all-purpose flour
- 1 teaspoon salt
- 1 tablespoon sugar
- 1 cup unsalted butter (cold and cubed)
- 6–8 tablespoons ice water

Extras:
- 1 egg (beaten with 1 tablespoon milk for egg wash)
- Coarse sugar for topping (optional)
Recommended Tools
To streamline the pie-making process, have the following tools on hand:
- Cherry pitter (a lifesaver for prep)
- Rolling pin
- Pastry cutter or pizza wheel
- Glass pie dish
- Slotted spoon
- Small saucepan
The Best Cherries for Baking
The key to a standout cherry pie filling is the fruit. We suggest:
- Dark sweet cherries – rich, deep flavor
- Rainier cherries – bright and slightly tangy
- Sour cherries – more traditional but require more sugar
If using frozen cherries:
- Make sure they’re pitted
- Do not thaw before mixing
- Still reduce the juices for a thick filling
Making the Pie Crust
A buttery, flaky pie crust is half the magic of a great cherry pie. You can use all butter or a mix of butter and shortening. For this recipe, all-butter gives excellent flavor and structure.
Step-by-step:
- In a large bowl, whisk together flour, sugar, and salt.
- Cut in cold butter using a pastry blender or your hands until the mixture resembles coarse crumbs.
- Gradually add ice water until the dough just holds together.
- Divide into two discs, wrap in plastic, and chill for at least 2 hours.
Making the Cherry Pie Filling
This homemade cherry filling sets up beautifully and slices cleanly once cooled.
Instructions:
- Mix cherries with sugar, cornstarch, lemon juice, vanilla, and almond extract.
- Let sit while rolling out the bottom crust.
- Use a slotted spoon to add cherries to the crust, reserving the juices.
- Simmer reserved juices in a small saucepan for 3–4 minutes to reduce.
- Pour reduced juice over the cherry filling and toss gently.
- Dot with cubed butter.
Assembling Your Cherry Pie
- Roll out one dough disc and line a 9-inch pie dish.
- Add the cherry filling as instructed.
- Roll out the second disc and cut into strips for a lattice top or keep it whole and vent with slits.
- Seal edges and crimp or flute.
- Brush with egg wash and sprinkle coarse sugar if desired.
Baking Tips
To prevent a soggy crust and activate the thickening agents:
- Preheat oven to 400°F (204°C)
- Bake at 400°F for 20 minutes
- Reduce temperature to 375°F (190°C) and bake an additional 30–40 minutes
- Shield crust edges after the first 20 minutes if browning too quickly
Cooling and Serving
This part is crucial! Let the pie cool for at least 3–4 hours before slicing. If cut too early, the filling may run and lose its beautiful, thick texture.
Serve with:
- Vanilla ice cream
- Fresh whipped cream
- A drizzle of cherry syrup for extra indulgence
Make-Ahead and Storage Tips
Want to plan ahead? Here’s how:
- The dough can be made up to 5 days ahead and refrigerated or frozen for 3 months.
- The baked pie keeps in the fridge for up to 5 days.
- Freeze baked pie (wrapped tightly) for up to 3 months. Thaw overnight in the fridge.
Common Mistakes and Fixes
- Runny filling – Usually from skipping the juice reduction step.
- Soggy crust – Avoid by using a glass pie dish and reducing filling liquids.
- Overbrowning – Use a pie shield after the first 20 minutes.
Fun Variations
Want to change it up?
- Crumble topping instead of lattice
- Mini hand pies for on-the-go treats
- Cherry pie bars in a sheet pan
- Gluten-free crust with almond or rice flour blend
Frequently Asked Questions
Do I need to pre-bake the crust?
No. Reducing the filling juice eliminates the need for blind baking.
Can I use frozen cherries?
Yes, just use them frozen and still reduce the juice.
Why is my filling watery?
Skipping the reduction or slicing too soon will cause this.
What’s a good thickener besides cornstarch?
Tapioca starch or flour can work, but adjust the ratios.
What’s the fastest way to pit cherries?
A cherry pitter is the best tool. You can pit 10–20 cherries per minute with one.
Final Thoughts
There’s something deeply satisfying about making a cherry pie from scratch—from pitting the cherries to weaving a perfect lattice crust. With fresh ingredients, simple techniques, and a little patience, you’ll create a dessert that’s both rustic and impressive. So roll up your sleeves, preheat that oven, and fall in love with the sweet reward of homemade baking.
PrintHomemade Cherry Pie From Scratch
- Total Time: 4 hours 30 minutes
- Yield: 1 pie (8 slices) 1x
- Diet: Vegetarian
Description
A timeless cherry pie with a flaky homemade crust, juicy cherry filling, and golden lattice top. Perfect for summer gatherings or any time you want a nostalgic dessert made from scratch.
Ingredients
- Filling:
- 4 ½ cups fresh pitted cherries (half halved, half quartered)
- ⅔ cup granulated sugar
- ¼ cup cornstarch
- 1 tablespoon lemon juice
- 1 teaspoon pure vanilla extract
- ¼ teaspoon almond extract
- 1 tablespoon cold unsalted butter (cubed)
- Crust:
- 2 ½ cups all-purpose flour
- 1 teaspoon salt
- 1 tablespoon sugar
- 1 cup unsalted butter (cold and cubed)
- 6–8 tablespoons ice water
- Extras:
- 1 egg (beaten with 1 tablespoon milk for egg wash)
- Coarse sugar (optional for topping)
Instructions
- Prepare the Dough: In a bowl, mix flour, salt, and sugar. Cut in cold butter until mixture resembles coarse crumbs. Add ice water gradually, mixing just until the dough forms. Divide into two discs, wrap in plastic, and chill for at least 2 hours.
- Make the Filling: In a bowl, combine cherries, sugar, cornstarch, lemon juice, vanilla extract, and almond extract. Let sit while rolling out the crusts. Use a slotted spoon to add cherries to the crust to avoid too much juice. Simmer reserved juices in a small saucepan for 3–4 minutes, then pour over cherries. Dot with butter cubes.
- Assemble the Pie: Roll out one disc and line a 9” pie dish. Add the cherry filling. Roll out the second disc and either cut into lattice strips or leave whole with slits for venting. Place over the filling. Seal and crimp the edges. Brush with egg wash and sprinkle with coarse sugar if desired.
- Bake: Preheat oven to 400°F (204°C). Bake for 20 minutes. Reduce temperature to 375°F (190°C) and bake another 30–40 minutes. Use a crust shield if edges brown too quickly.
- Cool: Let pie cool at room temperature for 3–4 hours to allow the filling to set.
- Serve: Best served with vanilla ice cream or whipped cream.
Notes
For best results, use a mix of halved and quartered cherries for texture. You can use frozen cherries, but thaw and drain well. Leftovers keep in the fridge for up to 4 days.
- Prep Time: 45 minutes (plus chilling)
- Cook Time: 60 minutes
- Category: Dessert
- Method: Baking
- Cuisine: American
Nutrition
- Serving Size: 1 slice
- Calories: 370
- Sugar: 20g
- Sodium: 150mg
- Fat: 20g
- Saturated Fat: 12g
- Unsaturated Fat: 6g
- Trans Fat: 0g
- Carbohydrates: 45g
- Fiber: 3g
- Protein: 4g
- Cholesterol: 55mg
Keywords: classic cherry pie, homemade pie crust, summer pie, lattice pie, fruit dessert

