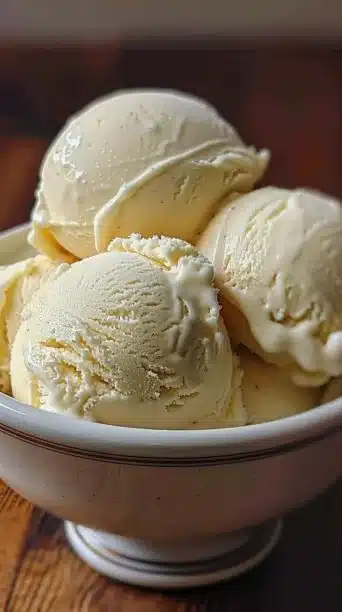
Homemade Vanilla Ice Cream
A bowl of homemade vanilla ice cream tastes like a warm summer memory scooped into cold, creamy perfection — simple, honest, and endlessly comforting. This classic recipe turns basic pantry ingredients into a luxuriously smooth custard that’s perfect on its own or as the base for any dessert experiment. If you want a cool finish to a hearty meal, try pairing a scoop with a savory main like the creamy chicken and rice easy rice recipe for a delightful contrast.
Why make this recipe
If you’re tired of store-bought ice cream that’s overly sweet, full of stabilizers, or lacking real vanilla flavor, this homemade custard-style vanilla ice cream is the solution: you control the ingredients, the sweetness, and the richness. It’s the perfect way to get a smooth, deeply flavored vanilla base that’s infinitely adaptable — use it plain, or add sauces, mix-ins, or boozy swirls for grown-up desserts. Plus, once you learn the technique for tempering eggs and making a custard base, you’ll be equipped to make countless other flavors from the same template.
Step-by-Step Guide to Making Homemade Vanilla Ice Cream
Ingredients:
- 2 cups heavy cream
- 1 cup milk
- 3/4 cup sugar
- 1 tablespoon vanilla extract
- 5 egg yolks
- Pinch of salt
Why these ingredients matter:
- Heavy cream provides the lush mouthfeel and structure; too little cream will yield an icier texture.
- Whole milk thins the custard slightly so it’s scoopable straight from the freezer after churning.
- Eggs create a custard base that emulsifies fat and water, preventing large ice crystals and giving the ice cream a velvety texture.
- Sugar sweetens and lowers the freezing point, making the finished ice cream softer and scoopable.
- Vanilla extract is the star flavor; using a real, good-quality vanilla extract makes a noticeable difference.
- Salt brightens the flavor and balances the sweetness.
Directions:
- In a medium saucepan, combine the heavy cream, milk, and sugar over medium heat. Stir gently and continuously until the sugar dissolves and the mixture is warm but not boiling — you want steam rising but no rapid simmer.
- Meanwhile, place the egg yolks in a medium bowl and whisk them until they’re slightly lighter in color and well combined.
- To temper the yolks, slowly pour about one cup of the warm cream mixture into the bowl with the yolks in a thin, steady stream while whisking constantly. This raises the temperature of the yolks gradually so they don’t scramble.
- Pour the tempered yolk mixture back into the saucepan with the remaining cream mixture, whisking to combine.
- Return the pan to low heat. Cook slowly, stirring constantly with a wooden spoon or heatproof spatula, until the custard thickens enough to coat the back of a spoon. When you draw your finger along the spoon, the line should hold. Do not let the mixture come to a boil; if it does, remove it from the heat immediately and cool slightly before continuing.
- Once thickened, remove the saucepan from the heat and stir in the vanilla extract and a pinch of salt. Taste and adjust the salt if needed; it should enhance the vanilla without being salty.
- Allow the custard to cool to room temperature, then cover and chill in the refrigerator for at least 4 hours, or overnight for best flavor and texture.
- After chilling, churn the custard in your ice cream maker according to the manufacturer’s instructions until it reaches a soft-serve consistency.
- Transfer the churned ice cream into an airtight container, press a piece of parchment paper directly onto the surface to prevent ice crystals, seal the lid, and freeze until firm (usually 4–6 hours).
- When ready to serve, let the container sit at room temperature for 5–10 minutes to soften slightly for easier scooping.
Best Way to Store Homemade Vanilla Ice Cream
- Storage temperature: Keep at 0°F (-18°C) or colder in the freezer.
- Short-term: Store airtight in the freezer for up to 2 weeks for best texture.
- Long-term: Can be stored up to 1 month; beyond that, ice crystals and freezer burn may degrade quality.
Practical tips on the container:
- Use a shallow, wide container rather than a tall, narrow one — it freezes and thaws more evenly.
- Press plastic wrap or parchment directly onto the surface of the ice cream before sealing to reduce the formation of ice crystals.
- If storing longer than two weeks, consider labeling the container with the date.
Serving Suggestions for Homemade Vanilla Ice Cream
- Classic scoops: Serve plain in a chilled bowl to highlight the pure vanilla flavor.
- Sundae bar: Drizzle with warm fudge, caramel, or berry compote; top with toasted nuts and whipped cream.
- With warm pies and crisps: A hot fruit crisp or apple pie with a generous scoop of this ice cream is a match made in dessert heaven.
- Sandwiches: Spread softened ice cream between two soft cookies and press, then freeze until firm for portable treats.
- Affogato twist: Pour a shot of hot espresso over a scoop for a quick adult dessert.
- Boozy twist: Fold in a tablespoon or two of bourbon, rum, or liqueur before the final freeze for a softer, adult-only scoop.
Tips to make Homemade Vanilla Ice Cream
- Chill everything: Make sure the custard is fully chilled before churning. Warm custard will take longer to freeze and can produce a grainy texture.
- Use good vanilla: A high-quality pure vanilla extract gives far better flavor than imitation; for a richer profile, use a scraped vanilla bean (add the seeds to the milk and cream) and steep before mixing with the eggs.
- Don’t over-churn: Stop when the mixture is thick and has the texture of soft-serve. Over-churning can make it grainy.
- Gentle heat: Cook the custard slowly over low heat and stir constantly to avoid curdling the eggs.
- Alcohol or sugar adjustments: If adding alcohol, reduce the sugar slightly to balance sweetness and keep texture scoopable.
Variations
- Vanilla Bean (bullet): For a deeply aromatic vanilla bean version, split one or two vanilla beans lengthwise, scrape the seeds into the milk and cream, and add the pods to steep while warming. Remove the pods before tempering the yolks.
- Bourbon Vanilla (paragraph): For a grown-up variation, stir in 1–2 tablespoons of bourbon into the cooled custard before chilling. The spirit enhances the vanilla notes and adds warmth; remember that alcohol slows freezing, so use sparingly to maintain scoopability.
Frequently Asked Questions
Q: Can I make this without an ice cream maker?
A: Yes. After chilling the custard, pour it into a shallow metal or glass pan and place it in the freezer. Every 30–45 minutes for the first 3 hours, remove and stir vigorously with a fork or whisk to break up ice crystals. This manual method won’t be as smooth as churning but produces a pleasant result.
Q: How do I prevent the custard from curdling when I heat it?
A: Cook the mixture slowly over low heat and stir constantly. Temper the eggs by gradually adding warm cream to the yolks before returning them to the pot. If the custard starts to simmer, remove it from heat immediately — simmering can cause the egg proteins to scramble.
Q: Can I use less sugar or a sugar substitute?
A: You can reduce the sugar a bit, but sugar not only sweetens but also affects the freezing point and texture. Reducing too much will make the ice cream harder when frozen. If using a sugar substitute, choose one designed for baking and freezing and be mindful of its effect on texture.
Q: How long does homemade ice cream keep?
A: Homemade ice cream is best within 2 weeks for optimal texture and flavor. It can be stored up to 1 month but may develop ice crystals and a slightly stale taste.
Q: Is it safe to use raw eggs?
A: This recipe cooks the eggs as part of a custard, which reduces the risk. If you’re concerned, you can pasteurize egg yolks at home or use pasteurized eggs.
Q: Can I make this dairy-free?
A: For a dairy-free custard-style ice cream, use full-fat coconut milk and coconut cream and consider a stabilizer (like a small amount of cornstarch or a commercial ice cream stabilizer) to mimic the richness of dairy. The texture will be different, but you’ll get a tasty alternative.
Extra technique notes:
- Strain the custard through a fine-mesh sieve into a bowl before chilling to remove any bits of cooked egg and ensure the smoothest texture.
- For faster chilling, place your custard bowl into an ice bath and stir until it cools before refrigerating.
Pairings and uses beyond scoops:
- Use as a base for ice cream cakes and layered desserts.
- Blend with fruit for creamy milkshakes.
- Serve alongside molten chocolate cakes or sticky toffee pudding for dramatic hot-and-cold contrast.
- Make simple flavor add-ins: stir in crushed toasted pecans for praline, swirl in raspberry coulis, or fold in chopped chocolate after churning.
Troubleshooting common problems
- Grainy texture: Usually caused by not chilling the custard long enough, overcooking the eggs, or under-churning. Chill thoroughly and churn until just thickened; strain if needed.
- Too hard in the freezer: Try adding a tablespoon of alcohol (vodka, rum, or liqueur) to lower the freezing point slightly, or up the sugar by a small amount.
- Ice crystals on the surface: This happens when air or moisture gets into the container. Press parchment or plastic directly on the surface before sealing and keep at a steady freezer temp.
Final notes on presentation:
- Warm your scooping utensil under hot water and dry it before scooping for perfectly round, glossy scoops.
- Create contrast with texture by adding crunchy toppings like toasted almonds, candied citrus peel, or cocoa nibs.
- Serve in chilled bowls for slower melting and a nicer mouthfeel.
Conclusion
If you want another trusted take on the basics and variations to compare technique and ratios, see Love and Lemons’ Homemade Vanilla Ice Cream recipe for a bright, ingredient-focused approach. For a down-to-earth, easy method and extra tips on batch size and freezing, check out Barefeet in the Kitchen’s guide to making homemade ice cream.
Enjoy making this simple, timeless treat — once you nail the custard method, vanilla ice cream becomes the foundation for endless homemade indulgences.
Print
Homemade Vanilla Ice Cream
- Total Time: 195 minutes
- Yield: 4 servings 1x
- Diet: Vegetarian
Description
A classic recipe for creamy, homemade vanilla ice cream that’s perfect for any dessert or enjoyed on its own.
Ingredients
- 2 cups heavy cream
- 1 cup milk
- 3/4 cup sugar
- 1 tablespoon vanilla extract
- 5 egg yolks
- Pinch of salt
Instructions
- In a medium saucepan, combine the heavy cream, milk, and sugar over medium heat. Stir gently until sugar dissolves and the mixture is warm but not boiling.
- Whisk the egg yolks in a medium bowl until lighter in color.
- Slowly pour about one cup of the warm cream mixture into the yolks while whisking, to temper the yolks.
- Pour the tempered yolk mixture back into the saucepan with the remaining cream mixture, whisk to combine.
- Return the pan to low heat, stirring constantly until the custard thickens enough to coat the back of a spoon.
- Remove from heat and stir in vanilla extract and a pinch of salt. Taste and adjust salt if needed.
- Allow to cool to room temperature, then cover and chill in the refrigerator for at least 4 hours, or overnight.
- Churn the custard in an ice cream maker until soft-serve consistency.
- Transfer to an airtight container, cover with parchment paper, seal, and freeze until firm (4-6 hours).
- Let sit at room temperature for 5-10 minutes before scooping to serve.
Notes
For best texture, store in a shallow container and use good quality vanilla extract for optimal flavor.
- Prep Time: 15 minutes
- Cook Time: 30 minutes
- Category: Dessert
- Method: Churning
- Cuisine: American
Nutrition
- Serving Size: 1 scoop
- Calories: 350
- Sugar: 22g
- Sodium: 50mg
- Fat: 24g
- Saturated Fat: 14g
- Unsaturated Fat: 8g
- Trans Fat: 0g
- Carbohydrates: 30g
- Fiber: 0g
- Protein: 4g
- Cholesterol: 210mg
Keywords: vanilla ice cream, homemade ice cream, dessert, custard